
7 Key Steps to Perform a Car Engine Brake Fluid Level Test
Understanding the significance of maintaining optimal brake system performance lies at the core of safe vehicle operation. In this article, we delve into a fundamental aspect of vehicle maintenance – the car engine brake fluid level test.
Addressing the critical safety and operational implications, this test stands as a pivotal component in ensuring your vehicle’s braking system functions impeccably when you need it most.
Clear guidance through 7 Key Steps is presented to equip mechanics, car enthusiasts, vehicle owners, and automotive technicians with the necessary know-how to conduct this essential test effectively.
In the realm of automotive care, overlooking the importance of monitoring brake fluid levels can have dire consequences on both safety and vehicle longevity.
Beyond its preventive role in identifying potential issues early on, understanding how to perform a car engine brake fluid level test serves as a proactive measure for individuals invested in maintaining their vehicles at peak performance levels.
From spotting contamination risks to ensuring consistent braking efficiency, each step outlined encapsulates a meticulous process that holds tremendous value for every responsible driver. Stay tuned for an enlightening journey through this indispensable automotive procedure that guarantees enhanced safety and driving experience.
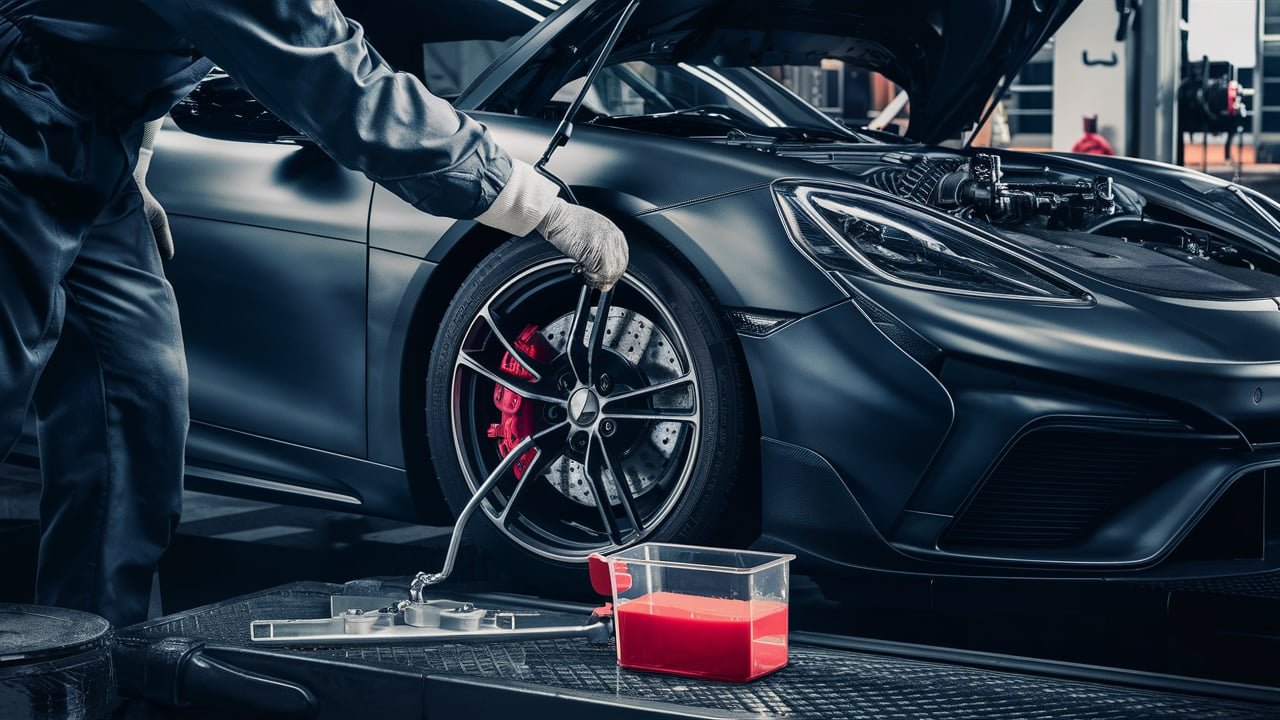
Step 1: Gather Necessary Tools.
Before diving into the car engine brake fluid level test, it is crucial to gather the essential tools that will facilitate a seamless process. Among these tools are a flashlight, clean rags, and safety goggles. The flashlight proves invaluable in illuminating the intricate areas around the brake fluid reservoir, ensuring no detail goes unnoticed during the inspection.
Clean rags are necessary to wipe any spills or excess fluid encountered while performing the test, maintaining a tidy workspace conducive to accurate readings. Equally important are safety goggles to protect your eyes from potential splashes or fumes that may arise when handling brake fluid.
Having all the required tools ready before commencing the test is paramount to its success. Imagine starting the process only to realize you lack a crucial tool halfway through – this interruption not only disrupts efficiency but also risks overlooking key details.

By preparing the designated tools beforehand, you pave the way for a focused and uninterrupted evaluation of your vehicle’s brake fluid levels. This organized approach sets the stage for a thorough assessment and ensures that each step in testing is carried out with precision and effectiveness.
For instance, picture yourself midway through inspecting the brake fluid level when you realize you need a clean rag to clear away some spillage for an accurate reading; without it readily available, you’re forced to pause the process, potentially forgetting where you left off or compromising on accuracy due to interruptions.
Conversely, with all tools within arm’s reach from the onset, every step flows seamlessly into the next, guaranteeing a meticulous examination of your vehicle’s vital components.
Preparing adequately with the necessary tools not only streamlines your workflow but also instills confidence in your assessment of the car engine brake fluid level – a practice essential for maintaining optimal vehicle performance.
Step 2: Locate the Brake Fluid Reservoir.
Locating the brake fluid reservoir is a crucial initial step in conducting a comprehensive car engine brake fluid level test. The position of the reservoir can vary across different vehicle makes and models, typically dependent on their designs.
In most cars, you can find the brake fluid reservoir secured near the engine compartment. For instance, in newer vehicles, it’s commonly situated towards the back of the engine bay, nestled among other components like the battery or air filter housing. On older models, the reservoir may be closer to the firewall or master cylinder.
Identifying the correct brake fluid reservoir ensures that you are targeting the right component for inspection and maintenance. Mistakenly inspecting an unrelated container could lead to inaccurate readings or improper assessment of your braking system’s health.
To avoid errors during this testing procedure, consult your vehicle manual for specific details regarding your car’s brake fluid layout. Sometimes, manufacturers indicate the location with clear markings like “Brake Fluid” or symbols representing brakes. Paying attention to such indicators aids in swiftly locating and accessing the correct reservoir without any confusion.

Before proceeding further with testing or maintenance tasks related to your braking system, take adequate time to find and confirm the correct brake fluid reservoir position on your vehicle model. This precision ensures that every subsequent step in evaluating and maintaining proper brake fluid levels is carried out accurately and effectively.
By understanding where your car’s brake fluid resides within its intricate engineering setup, you lay a solid foundation for successful troubleshooting and upkeep of this critical component for safe driving performance.
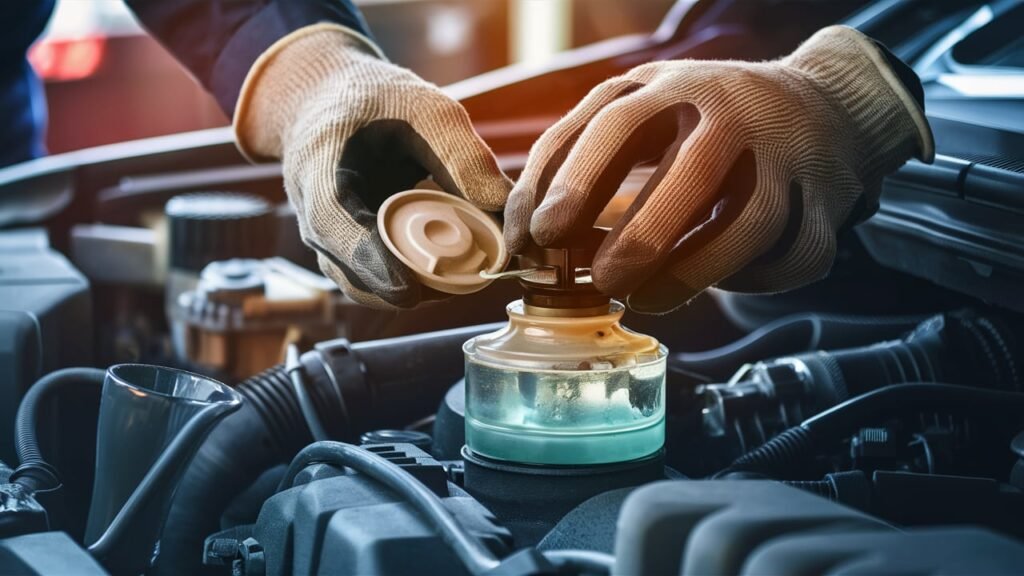
Step 3: Inspect Brake Fluid Level.
Inspecting the brake fluid level is a crucial step in maintaining optimal vehicle performance. To begin, locate the brake fluid reservoir as detailed in Step 2. Once located, remove the reservoir cap carefully to expose the interior for inspection. Inside the reservoir, there are generally minimum and maximum markers indicated on the side walls.
These markers signify the acceptable range within which the brake fluid level should ideally fall. It is important to understand that exceeding or falling below these markers can lead to potential braking system issues.
To visually inspect the brake fluid level accurately, use proper lighting, such as a flashlight, if needed. Slowly peer into the reservoir without tilting it excessively to avoid spillage. The fluid level should align with either the upper (maximum) or lower (minimum) indicators on the reservoir wall.
If the level falls below the minimum marker, it indicates a need for topping up to maintain safe brake performance. Conversely, if it exceeds the maximum marker, excess fluid will require removal to prevent overfilling and potential system complications.

Understanding and interpreting these markers correctly will enable you to gauge whether your vehicle’s braking system is operating within optimal parameters. Monitoring and adjusting brake fluid levels accordingly contribute significantly to overall safety while driving.
By adhering to this meticulous inspection process at regular intervals, you ensure that your brakes operate efficiently and effectively when called upon during critical moments on the road.
Step 4: Check Brake Fluid Color and Consistency.
When conducting a car engine brake fluid level test, assessing the color and consistency of the brake fluid is crucial in maintaining the optimal performance of your braking system. Here’s how to evaluate these aspects efficiently:
Color Analysis:
Brake fluid typically comes in various hues, ranging from clear to amber. Fresh brake fluid appears almost transparent with a slight yellow tint. Over time, due to exposure to heat and moisture, brake fluid can darken to a shade closer to light brown or even dark brown if contaminants are present.
If you notice a significant darkening in color, it could indicate contamination from water or rust within the braking system.
Consistency Examination:
The consistency of brake fluid should resemble that of olive oil – smooth and free-flowing. Any signs of grittiness or cloudiness when inspecting the consistency suggest contamination or degradation. Contaminated brake fluid loses its lubricating properties and may lead to corrosion within the braking components.
Ensuring Proper Functionality:
Maintaining the correct color and consistency of brake fluid is vital for safe driving conditions as contaminated or degraded fluids can compromise your vehicle’s braking power. Timely checks for color changes and abnormal consistencies can help safeguard against potential brake failure accidents.
Remember, it’s not just about having enough fluid; it’s also about ensuring that the quality remains at an optimum level for efficient braking performance.
By regularly monitoring both the color and consistency of your brake fluid as part of your maintenance routine, you contribute significantly to prolonging the lifespan of your vehicle’s braking system while enhancing overall safety on the road.
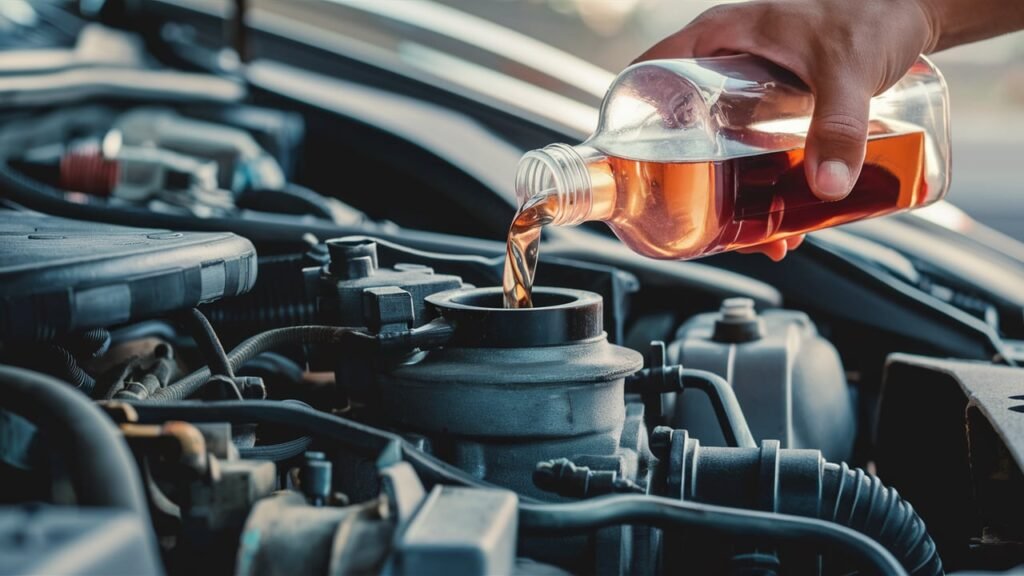
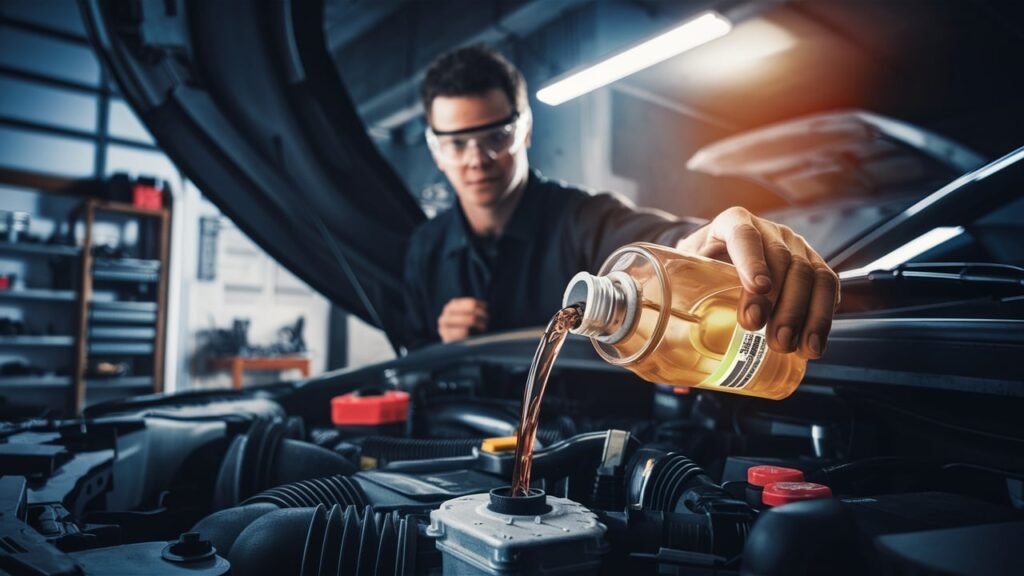
Step 5: Top-Up Brake Fluid (if necessary)
When the brake fluid level dips below the minimum mark after inspection, it’s crucial to top it up promptly to ensure the braking system functions optimally. To begin the process, gather the correct type of brake fluid suitable for your vehicle—consulting the owner’s manual or seeking guidance from a professional if unsure about the specific requirements.
Selecting the appropriate brake fluid is vital as different vehicles may necessitate varying types to maintain performance and safety standards.
To proceed with topping up the brake fluid, carefully open the reservoir cap following all safety precautions. Slowly pour in the new brake fluid until it reaches just under the maximum marker within the reservoir.

It’s paramount not to overfill as this can lead to overflow during operation, causing damage to surrounding components or compromising braking efficiency. Once filled appropriately, seal the reservoir tightly to prevent any contaminants from entering and affecting the fluid quality.
As an illustrative example, imagine a scenario where a car owner notices reduced braking responsiveness and decides to inspect their vehicle’s brake fluid level. Upon discovering that it is below the recommended level, they follow these steps diligently by selecting DOT4 brake fluid compatible with their car model.
By cautiously adding just enough fluid and securely sealing it back in place, they effectively address potential safety concerns and restore their vehicle’s braking system efficacy without costly repairs or accidents resulting from inadequate maintenance practices.
Step 6: Reassemble Components.
After topping up the brake fluid, the next crucial step in a car engine brake fluid level test is to reassemble any components that were earlier removed for access to the reservoir. Remembering the sequence of disassembly can be valuable for a seamless reassembly process.
Start by positioning the reservoir cap back securely and making sure it is properly tightened to safeguard against leaks. If there were any auxiliary components or covers, ensure they are placed back correctly without misalignments.
As you reassemble the components, inspect for any defects or damages that could have occurred during removal. Thoroughly examine connections such as hoses or clamps that were detached previously, ensuring they are reattached firmly and aligned properly.
This meticulous approach guarantees that all parts essential for the braking system’s integrity are precisely fitted to avoid potential malfunctions or safety hazards down the road.
An illustrative example of this step involves checking gaskets or seals that might have been disturbed during disassembly. Verifying their condition prevents issues like air infiltration into the brake system, which can compromise its performance.

Pay close attention to alignment marks if applicable when putting pieces back together, maintaining precision throughout this phase helps maintain optimal function and safety.
Ultimately, taking time and care during reassembly ensures not only functionality but also safety in your vehicle’s braking system. By rigorously inspecting parts before fitting them back into place and verifying that all connections are secure, you contribute significantly to the overall maintenance and reliability of your vehicle’s brakes.
Striving for excellence in every detail underscores your commitment to safe driving practices and consistent vehicle upkeep.
Step 7: Test Brakes Post-Fill.
After ensuring the brake fluid level is optimal and reassembling the components, it’s crucial to conduct a thorough brake test to verify proper functioning. Begin by preparing a safe testing environment in an open space with minimal traffic or obstacles.
With the vehicle in park or neutral (for manual automobiles), start the engine and let it idle for a few minutes to build up hydraulic pressure in the braking system.
For safety, engage the parking brake before proceeding further. Once you have sufficient pressure built up, cautiously depress the brake pedal multiple times to check for any abnormal resistance or sponginess.
An ideal brake pedal should feel firm and responsive underfoot without sinking too close to the floor. Listen for any unusual noises like squealing, grinding, or metallic sounds which might indicate issues with brake pads or rotors.
As you perform this post-fill brake test, be mindful of your surroundings and avoid sudden movements during testing. It’s advisable to conduct several gentle stops at different speeds after filling the brake fluid.

This approach allows one to assess whether there are any irregularities like pulling to one side, vibrations, or delayed braking response that need addressing promptly by a qualified professional mechanic if detected.
In conclusion, conducting a comprehensive post-fill brake test serves as a vital step in maintaining optimal vehicle safety and performance standards. By adhering to these guidelines and being vigilant while assessing your brakes post-filling your car’s brake fluid, you play an active role in ensuring a secure driving experience for yourself and other road users alike.
Remember that safety on the road starts with mechanical integrity – especially when it comes to critical systems such as brakes – so never underestimate the importance of regular maintenance checks.
Conclusion – Importance of Regular Testing.
Regular testing of the brake fluid level in a car engine is essential to ensure the proper functioning of the braking system. By following the 7 key steps outlined in this article, mechanics, car enthusiasts, vehicle owners, and automotive technicians can effectively maintain their vehicles’ safety and performance.
Performing routine checks on brake fluid levels helps identify issues early on, preventing potential brake failures and ensuring optimal stopping power when needed.
By incorporating brake fluid level tests into regular maintenance schedules, individuals can extend the lifespan of their vehicles’ braking components and contribute to overall road safety. Consistent monitoring allows for timely identification of leaks, contamination, or inadequate fluid levels that could compromise braking efficiency.
Upholding these testing practices not only safeguards drivers and passengers but also promotes responsible vehicle ownership by prioritizing preventive care over reactive repairs.
Therefore, adhering to a proactive approach in checking and maintaining brake fluid levels is paramount for upholding both operational excellence and roadworthiness in automotive systems.
Related Posts
What is a car engine brake fluid refill?
The Essential Guide to Car Engine Brake Fluid Recharge
What You Need to Know About Topping Off Car Engine Brake Fluid
George Mackline – Author.

As the proud owners of automobill.net, we stand at the forefront of automotive knowledge, delivering unparalleled expertise across all sectors of the automotive industry.